Click here for a Decision table to determine the kits best suited to your students' needs.
For more detailed information about each kit please refer to the individual kit's teaching unit Overview. If the Overview is not downloadable please contact us and we will email you a copy.
Beepa (30 hours)
Code: BEEPA
Click here for teaching unit Overview
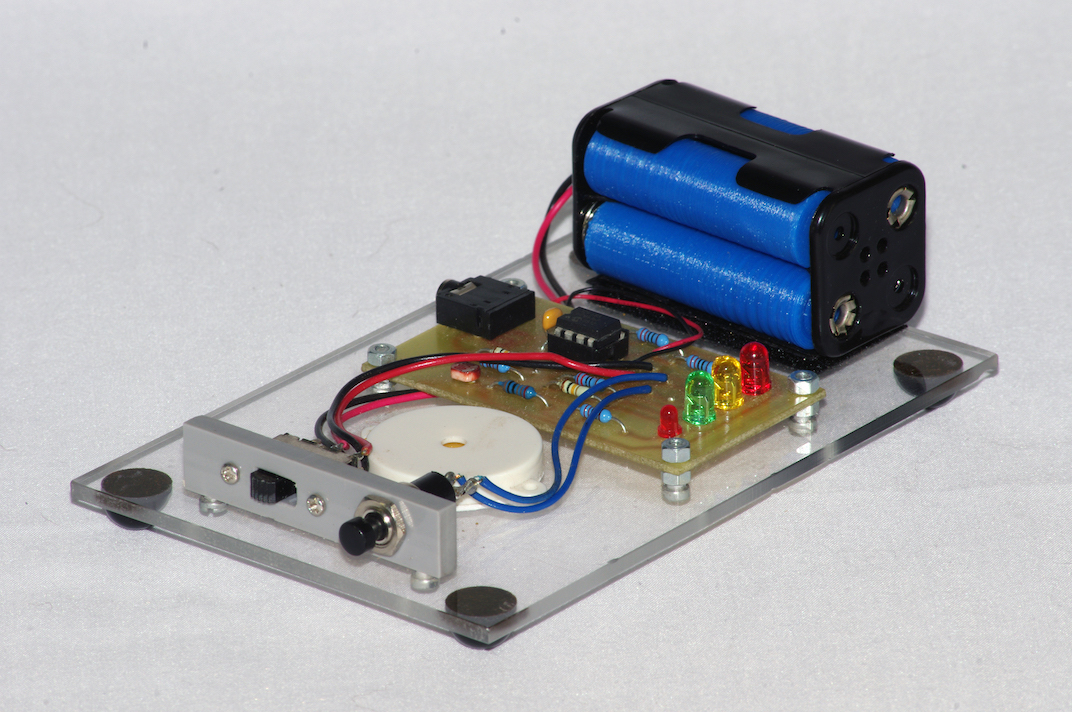
The BEEPA project provides an introduction to microcontrollers, programming and electronics. BEEPA can be programmed to light three LEDs, produce sound from a piezo transducer, respond to pushbutton presses and respond to the light level.
Beetle (20-30 hours)
Code: BEETLE
Click here for teaching unit Overview
BEETLE is a six-legged user programmable device. When it hits an object, BEETLE backs away, turns around and continues in another direction, imitating the actions of a real beetle. BEETLE also changes direction when it doesn't bump into anything for some time. BEETLE has a lever arm microswitch at either end to detect an obstruction. It is driven by two motors, each with its own gearbox, and is controlled by a PICAXE-08M2 micro-controller.
Controller (30 hours)
Code: CONTROLLER
Click here for teaching unit
The CONTROLLER is a general purpose controller, and may be used control up to six small DC motors with simple position feedback. The central control element for the CONTROLLER is a Picaxe-40X microcontroller. Other devices may also be connected to the unused inputs and outputs. The CONTROLLER is suitable for many applications, such as the ROBOT ARM.
Dizzy (20-30 hours)
Code: DIZZY
Click here for teaching unit Overview
DIZZY is a two-wheeled user programmable vehicle. When it hits an object, DIZZY backs away, spins around quickly (hence its name) and continues in another direction. DIZZY also changes direction when it doesn’t hit anything for some time. DIZZY has a lever arm microswitch at each end that detects an obstruction. It is driven by two electric motors, each with its own gearbox, and is controlled by a PICAXE-08M2 microcontroller. The prototype DIZZY was built using recycled CDs, but the concept has scope for individual variation.
Follow White Line Vehicle (35-45 hours)
Code: FWLV
Click here for teaching unit Overview
The FOLLOW WHITE LINE VEHICLE follows a white line taped to a dark surface. Light Dependent Resistors determine the position of the vehicle relative to a white line, and steer it along that.
Forklift (40-50 hours)
Code: FORKLIFT
Click here for teaching unit overview
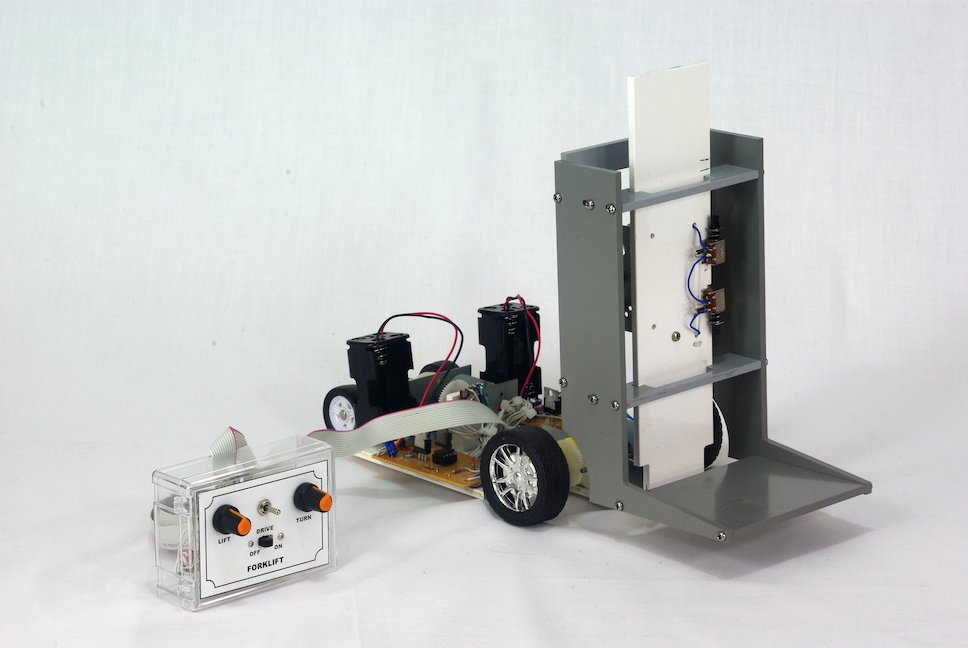
The FORKLIFT is a motorised vehicle that can drive, steer and lift a load. These motions are controlled by a tethered control box. This unit details the construction of our prototype FORKLIFT, which is 300mm long x 140mm wide x 250mm high. The design and size of the vehicle depends on the student’s choices in design and construction. The major aspects of this project are planning, design, component identification, part manufacture, maximizing effective use of materials, assembly, testing and evaluation.
Radio Controlled Vehicle (Assembled PCBs 30-35 hours) (Unassembled PCBs 33-38 hours)
Code: RCV with PCBRCRT-A (assembled PCBs)
Code: RCV with PCBRCRT-UN (unassembled PCBS)
Click here for teaching unit
The RADIO CONTROLLED VEHICLE (RCV) is a motorised vehicle, controlled and steered by remote control. There is a receiver PCB (Printed Circuit Board) mounted on the vehicle and a transmitter PCB in a hand held control box. This remote control unit controls the vehicle’s forward and reverse motion, as well as the steering. The vehicle is driven by a gearbox/motor assembly, and steered by an electric motor through a steering rod and a steering link. The radio transmission distance is approximately 25 metres, and under favourable conditions can be greater.
Robot Arm (50-60 hours)
Code: ROBARM
Click here for teaching unit Overview
The ROBOT ARM is a five-axis pick-and place manipulator. The axes provide the following functions: gripper, gripper rotation, wrist, forearm and arm. Each of the axes is driven by an electric motor. The ROBOT ARM is controlled by five two-way switches and is powered by four AA batteries.
Robot Arm Controller
Code: ROBARMCONT
Click here for teaching unit
One use for the CONTROLLER is to enable the five motors in the ROBOT ARM to be controlled using position feedback. This document details the use of the CONTROLLER with the ROBOT ARM. The central control element for the CONTROLLER is a Picaxe-40X microcontroller. The CONTROLLER may be incorporated into initial design of the ROBOT ARM or may be used to convert the ROBOT ARM at a later date. The CONTROLLER may also be used for mechanisms that require up to six axes of motor control with position feedback. Other devices may also be connected to the unused inputs and outputs.
Seeker V2 (22-28 hours)
Code: SEEKERV2 (Unassembled gearbox)
Click here for teaching unit overview
The SEEKER V2 is a three-wheeled vehicle. Each front wheel is driven by a separate gearbox/motor. At the rear is a swivel mounted trailing wheel, allowing the vehicle to change its direction of travel easily.
The direction of travel of the vehicle is controlled by two LDRs (Light Dependent Resistors). When an object is approached, or shade is encountered, the SEEKER will reverse and change its direction of travel. There is a PCB and a significant number of electronic components controlling the vehicle.
Wanderer v2 (23-29 hours)
Code:WANDV2 (Unassembled gearbox)
Click here for teaching unit overview
The WANDERER is a three wheeled vehicle. Each front wheel is driven by a separate gearbox/motor. The rear has a swivel mounted trailing wheel, allowing the vehicle to change its direction of travel easily.
The WANDERER is controlled by two switches mounted at the front of the vehicle, and activated by a bumper bar. When it encounters an object one or both switches will operate and cause it to reverse and turn away from the object. There is a PCB and a significant number of electronic components controlling the vehicle.
Wombat v2 (18 hours)
Code: WOMBATV2
Click here for teaching unit
The WOMBAT V2 is a black-line-following vehicle, and follows a curved track on a contrasting background. An electronic circuit senses the line position and changes the speed of each driven wheel as required, keeping the WOMBAT on track. Each wheel is controlled separately by the PCB, with the output of the LDRs being used to control the steering.
Need a simpler or less time consuming kit. Check out Intermediate or Introductory kits


